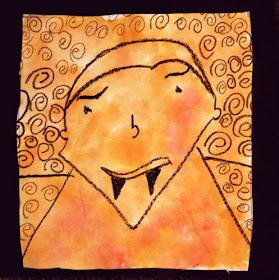
One day while looking through some images looking for something (I don't remember what), I saw a little orange and black witch profile art piece that got me to thinking. I had a subbing day scheduled the week before Halloween in a second grade class in which the students are particular adventurous, so I figured they would be a good group to try out a new lesson that would require them to use a viewfinder, make preliminary sketches, draw a large version of one of their small sketches, then crop their design, paint it, and frame it. I had visions of bold, black contour drawings with bright orange textured background, and lots of options for cropping.
It's hard to get some kids to draw something bigger than their pinkie, and I wanted them to draw large, and boldly, giving some attention to placement, scale, background, and detail. That's a lot for a second grader, but we went slowly and used pretty much the whole day for the lesson.
We started with a picture walk through the book Look! Look! Look! by Tana Hoban, then I taught them how to make a small viewfinder. I had them look at my face, move the viewfinder closer and further away, look at their own hand, and look around the room in general. This was to give them an opportunity to look at the environment the way an artist does, blocking out unneeded parts and just experimenting with placement in the viewing window.
The next step was generating a list of Halloween nouns, for them to use for ideas for drawing. This was followed by having them fold a piece of scratch paper into fourths and do four different small drawings. They chose one of these to draw bigger on a white paper, using only a black crayon, with instructions not to color anything in because these were contour drawings. I let them know that we would be painting them later.
Next, they made a cropping window and placed it over their drawing to help them choose how to crop their composition. This was kind of like using a giant viewfinder. They drew a pencil line for the cropping lines, then sponge painted inside that square with orange watercolor.
By now it was about one hour before the end of the day. There was just enough time left to cut on the pencil lines to trim the excess off their drawings and mount their "close up" compositions on black paper. And to show off.
After we had a chance to look at everyone's work, I had a few students choose someone else's picture and tell what they liked about it. They were remarkably articulate! "I like the collar." "I like the pattern in the background." "I like the spider web." "I like that it looks scary."
This turned out to be a pretty successful lesson with a lot going for it. The students were intrigued by the viewfinders, and I was thrilled to see that hardly anyone drew tiny pictures. I think making the preliminary sketches (and modeling that process) helped a lot. If I had wanted to stretch this lesson out even further, I could have had the students do all the measuring for their cropping window mats; I would definitely do that if I were teaching this to an older group. And just to show how great this class is, they put all the painting sponges back into color-coded baggies with no mistakes!


Wow!
ReplyDeleteI'll take that as a compliment, KB3Teach. Thanks!
ReplyDeleteThis comment has been removed by the author.
ReplyDelete