• supporting creativity in the classroom and beyond •

• supporting creativity in the classroom and beyond •
Showing posts with label cutting. Show all posts

march into green art

Simple paper sculptures are a perfect introduction to 3D art for Kindergarters and first grade students. I have done these in a variety of colors, but during March when students are learning about leprechauns, I have them use only green paper.
With these green "Leprechaun Playgrounds" I encourage students to create as many three-dimensional elements as possible. Of course I demonstrate twisting and folding techniques, but it's amazing what they can come up with on their own.
Prep is easy; simply cut tons of paper strips from the 9" end of 9x12 construction paper, roughly an inch wide. No measuring is necessary so don't worry about the width. In fact, variation in widths of the paper is even better. In fact, if students are fairly practiced with scissors, it's even better to have them cut their own strips.
I like to also provide a few 4x4 inch squares on each table for kids to make cylinders, or to cut out shapes to use along with spirals, accordion fold, circles, or whatever else they might come up with. Some students may decide to make paper chain loops that hang loose. Once I even had two little girls attach several strips to end to end, creating long, long tails that hung down to the floor.
This simple art lesson that delivers a lot of learning for little ones: lots of scissor practice, lots of use of those fine motor skills, lots of experimenting with paper folding, and lots of just plain fun... all in the context of an authentic art lesson that introduces children to sculpture as an art form! 
Check out this lesson .... and two more 'green art' lessons for St. Patrick's Day, here in my TeachersPayTeachers store! Enjoy!


learning to cut

Third day of school.
Kindergarten.
Choose a color.
Cut into strips.
Glue onto black paper.

I can't begin to count the number of second and third grade students I've seen in the past few years who could not efficiently use a pair of scissors. So when working as a support helper for the first three days of school in Kindergarten, I manned a center where the kids only needed to cut. Not on lines, not on shapes, just cut.  I showed them how to use the scissors -- thumb in the small hole, fingers in the big hole -- and how to hold the paper -- vertically, with the scissors pointing to the sky -- and asked them to cut their paper into strips.

Each student was able to choose a color, and in a group of six, everyone had a different color (there were about nine bright colors to choose from) so nobody's strips got mixed up on the table. Everyone also got a sheet of black paper to glue their strips on, and to make things easy, I brushed watered-down white glue all over the black paper and they just needed to lay their cuttings down onto the wet glue. This job was all about cutting and nothing else.

I always encourage / teach kids to hold their paper vertically, cut pointing to the sky, and to turn the paper instead of the scissors. This helps them be able to see exactly what they are cutting, because the paper and scissors are at eye level. This is particularly important if they are cutting on a line, or cutting out a shape, but for this activity, there were no lines to follow at all, so each child was able to just cut their strips the best they could. I gave no directions on how to glue them on the paper, and it was interesting to see how the children had different methods for gluing, some being very meticulous and orderly, others gluing the strips in a more haphazard manner.

When they were all finished, we had a beautiful assortment of line art, all ready to go on the wall. Even though each child had the same directions, no two of these were alike. I think they made a perfect first art activity!


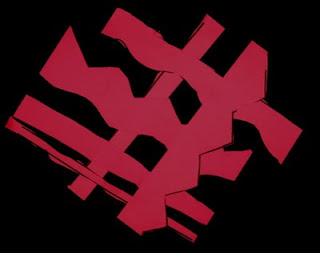
patriotic colors collage

These "patriotic color" collages are fun and easy to do with Kindergarten through fourth grade students. The ones pictured here were done by a second grade class.

 If I have time, I begin the activity with a "looking at art" session where students tell what they notice in Alexander Calder's lithograph, Stars and Stripes Students are generally quick to notice that Calder used only red and blue, and that it reminds them of the American flag, or the 4th of July. They often notice that the piece has more red than blue, and that one of the stars has a dot in the middle of it.

The "looking at art" session is followed by the art activity itself, in which there are very few rules other than to be creative, use shapes and strips or stripes to create an interesting design, and to NOT make a flag. Some students have a hard time getting beyond the flag itself, but the addition of yellow stars helps. Each student gets a 9x12 white background, a 6x9 piece of red, and a 4x6 piece of blue, plus the yellow for the stars.

 As part of the lesson, I teach 2nd grade and older students how to make a "quirky star" by drawing a circle in the center of a yellow square, drawing five dots around the circle, then connecting the dots to the circle, in sequence (it's easier than it sounds). First graders just draw and cut out a yellow star, and Kindergartners get a pre=printed yellow star which they are asked to tear out. I never give the students pre-cut stars because I want the stars to be quirky, asymmetrical, and fanciful.

 This lesson is pretty much fool-proof; anything students come up with looks great!

.

kindergarten line collages

Take a classroom of kindergartners, hand them some scissors and construction paper, and then some glue sticks. Show them how to cut strips. Pile all the strips in the middle of the table, and set them free. That's what I did in a kindergarten class last week at a school where I used to run an art program. The teacher told me, while reviewing the day, that if I wanted to do "an art thing" to feel free. So, with her permission I set aside what she had planned for my center and instead I had the students just cut strips from many different colors of construction paper.

 It's always interesting to watch kindergartners using scissors. In fact, it takes more than watching. Sometimes I have to rearrange the scissors in their hands so that the right fingers are in the right holes. And I like to teach kids to hold the paper upright and cut with the scissors pointing to the ceiling. I tell them this is how artists do it. Well, it's how I do it, and I'm an artist, so I guess that's ok.

After the cutting station and a recess break, everyone got a sheet of black construction paper and a glue stick. My directions to them were to use the strips to make a picture or a design, and to be creative. I showed them how to use a piece of scratch paper on which to lay the strips when applying the glue so the tables wouldn't get all sticky. Some worked in complete concentration, meticulously arranging the strips to create houses or other "name-able" objects. Others glued the lines/strips in random order, while still others clearly had something in mind, even if the result was clearly non-representational... at least to the casual observer.

 For sharing, each finished composition was held up for admiring. I had the students tell what they could see, or what it looked like. It was fun and interesting to hear how they interpreted each others' art work. This was SO easy and the kids got a whole lot of practice cutting and gluing, like Kindergartners should!
.

kindergarten line collages

These are incredibly simple to do and give students an opportunity to practice cutting. The best part is that every single student's work is a success, no matter what. There also isn't a huge amount of preparation, and practically no clean up.

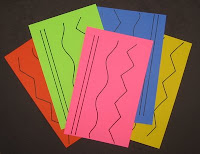
To prepare, I created a line template for students to cut. I wanted them to experience cutting a variety of lines, so on half a sheet of copy paper I drew a couple of straight lines, a meandering line, and a zig-zag line, then duplicate it on the other half of the paper. Then I copy this onto 9x12 construction paper in about ten or so colors and chop those in half.

I start the lesson by talking about lines. I ask students to tell me what they know about lines; I draw samples on the white board. Then I quickly demonstrate the activity. To start, each student chooses one template to cut. I like to make way more than the number of students, and put one of each color on each table. This way every student gets a choice of color, and every student at each table is working with a different color. Once they choose their color I just take away the extras. As they work, I help those students who are still learning to use scissors... and there are many of them. Some don't know where their fingers go. Some try to cut upside down. I show them how to hold the paper vertically, cut going "up" and to turn the paper instead of the scissors.

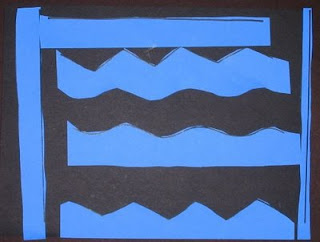
Students simply cut on the lines and then glue the resulting pieces onto black construction paper. Voila! Finished artwork! But not a finished lesson. We also look at two at a time and compare what different students do with their pieces. Some students like to glue them down in straight rows. Others will overlap them. Some create a border. Others just glue with no plan. Whatever they do, each one is a success, and they are awesome to look at when displayed on the wall.