• supporting creativity in the classroom and beyond •

• supporting creativity in the classroom and beyond •
Showing posts with label positive/negative space. Show all posts

sunbursts, starbursts, and silhouettes

Sometimes when I am looking for an idea for an art lesson, I scout around the Artsonia website. That's where I found these interesting starburst designs, done with primary and secondary colors. They looked easy and fun so I decided to try them in warm or cool colors with a second grade class. To introduce the lesson, I just posted a piece of paper and started drawing with three warm colors:  yellow, gold, and orange. I tried to emphasize the zigzaggy method of creating concentric circles of rays. After I had laid down about six rows, I put up another paper and started another one with cool colors: turquoise, blue, and purple. During this introduction, I did not speak at all. When I had two good starts, a warm one and a cool one, I had the students tell me what I did. These became the directions:

- choose 3 colors, warm or cool
- start near the center with a dot
- get bigger and bigger
- fill the whole paper
- no scribbling!

I gave them directions to choose three warm or cool colors and show them to me. Several students mixed the palettes; instead of giving them paper, I said, "you have two warms and one cool" or "you have two cools and one warm." I didn't tell them which color needed to be replaced; I left that up to them. As they got started, I quickly noticed that some students had difficulty making the short, zigzaggy strokes radiating out from the center of the circle. A few were coloring concentric lines instead, or lines that looked like open zigzags. For those few students, I took their hand in mine and showed them how to make the little zigzags.

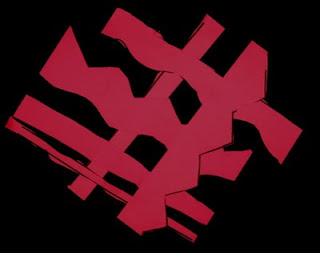
When the first student had finished filling the whole paper, I interrupted their work for a lesson in making the cityscape silhouette. On black construction paper, I first drew a line across the bottom, a few inches up. Then I started with a tall rectangle in the center for a building, added a roof, and proceeded to add more rectangles until building shapes extended across the whole paper. I pointed out to the students how the buildings were not touching, but were pretty close to each other. I demonstrated cutting them carefully, and gluing down the silhouette. I made a big deal about putting the glue on the side of the paper that has the pencil lines so that the clean side will be the one we see when it's done. When I held up the finished product, there were a lot of oooohs and aaaaahs.

When doing the silhouette, some students mistakenly cut off the baseline, or cut off one of the buildings by accident, so they needed to do that part over. A few students put the glue on the wrong side of the paper (this always happens!) so we needed to do a little erasing. Overall, the results were pretty striking, especially when they were lined up along the white board tray.


And what about the other half of the black paper? Students were very intrigued by the opposite effect, and asked what to do with them. I decided to collect them and use them for a future activity. I haven't invented that one yet, but they are safe in a manila envelope.

pentangles

Recently I began running into these things called Zentangles every once in a while, which look suspiciously like the doodles in the margins of all my college notebooks. I began to remember how it would be easier for me to concentrate on lectures if, between note-taking, I was doodling. Just a fact of life for the visual among us.....

I started thinking that this would be fun to do as an art lesson with kids. All the Zentangles I saw were simply black on white, with lots of repetitive lines, dots, squiggles, etc, to fill up space in a seemingly random way. Would it be relaxing for kids, or would it be frustrating? How would I present it?

My idea was to introduce it with no talking. I gathered kids together.... this was a second grade.... and put up a sheet of 9x12 white paper on the wall and started with one long, sweeping, curving line. I added more lines next to it, several grouped together, then started off in another direction. I kept "adding to" with groups of dots, or little zig-zags, or whatever. Then I stopped.

"What was I doing?" I asked them, and among their responses, I started writing down some key items.... "drawing lines".... "drawing dots".... "doing the same thing again and again"... etc..... until I had some guidelines on the board next to my demonstration paper. Then I gave them directions:

Start with one long line across the paper. Make sure it goes off the edges. Add five more lines right next to it. Then, either make more of those lines or go in a new direction. Here's the rule:  You need to really, really think about what you are doing and you have to repeat each line, dot, shape, or design at least five times.

Five times.  So now I had another idea:  As students finished, I had them choose one colored pencil to color in five spaces, anywhere on the paper, all with the same color. And I renamed them Pentangles. :-)

Here's the best part:  This class is notoriously chatty. Yak yak yak all day long. During this activity, you could practically hear a pin drop! Usually during art time there is a noticeable amount of chatter, conversation, etc., but this activity just inherently seemed to turn the classroom into a whole group of little mindful people, all concentrating on their own designs.

We mounted the finished product on colored construction paper, and they are awesome!


kindergarten line collages

These are incredibly simple to do and give students an opportunity to practice cutting. The best part is that every single student's work is a success, no matter what. There also isn't a huge amount of preparation, and practically no clean up.

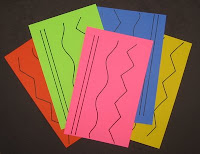
To prepare, I created a line template for students to cut. I wanted them to experience cutting a variety of lines, so on half a sheet of copy paper I drew a couple of straight lines, a meandering line, and a zig-zag line, then duplicate it on the other half of the paper. Then I copy this onto 9x12 construction paper in about ten or so colors and chop those in half.

I start the lesson by talking about lines. I ask students to tell me what they know about lines; I draw samples on the white board. Then I quickly demonstrate the activity. To start, each student chooses one template to cut. I like to make way more than the number of students, and put one of each color on each table. This way every student gets a choice of color, and every student at each table is working with a different color. Once they choose their color I just take away the extras. As they work, I help those students who are still learning to use scissors... and there are many of them. Some don't know where their fingers go. Some try to cut upside down. I show them how to hold the paper vertically, cut going "up" and to turn the paper instead of the scissors.

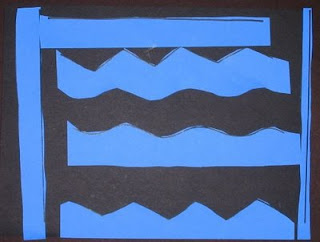
Students simply cut on the lines and then glue the resulting pieces onto black construction paper. Voila! Finished artwork! But not a finished lesson. We also look at two at a time and compare what different students do with their pieces. Some students like to glue them down in straight rows. Others will overlap them. Some create a border. Others just glue with no plan. Whatever they do, each one is a success, and they are awesome to look at when displayed on the wall.